Followers

Showing posts with label beginners challenges. Show all posts

Tuesday, January 15, 2019

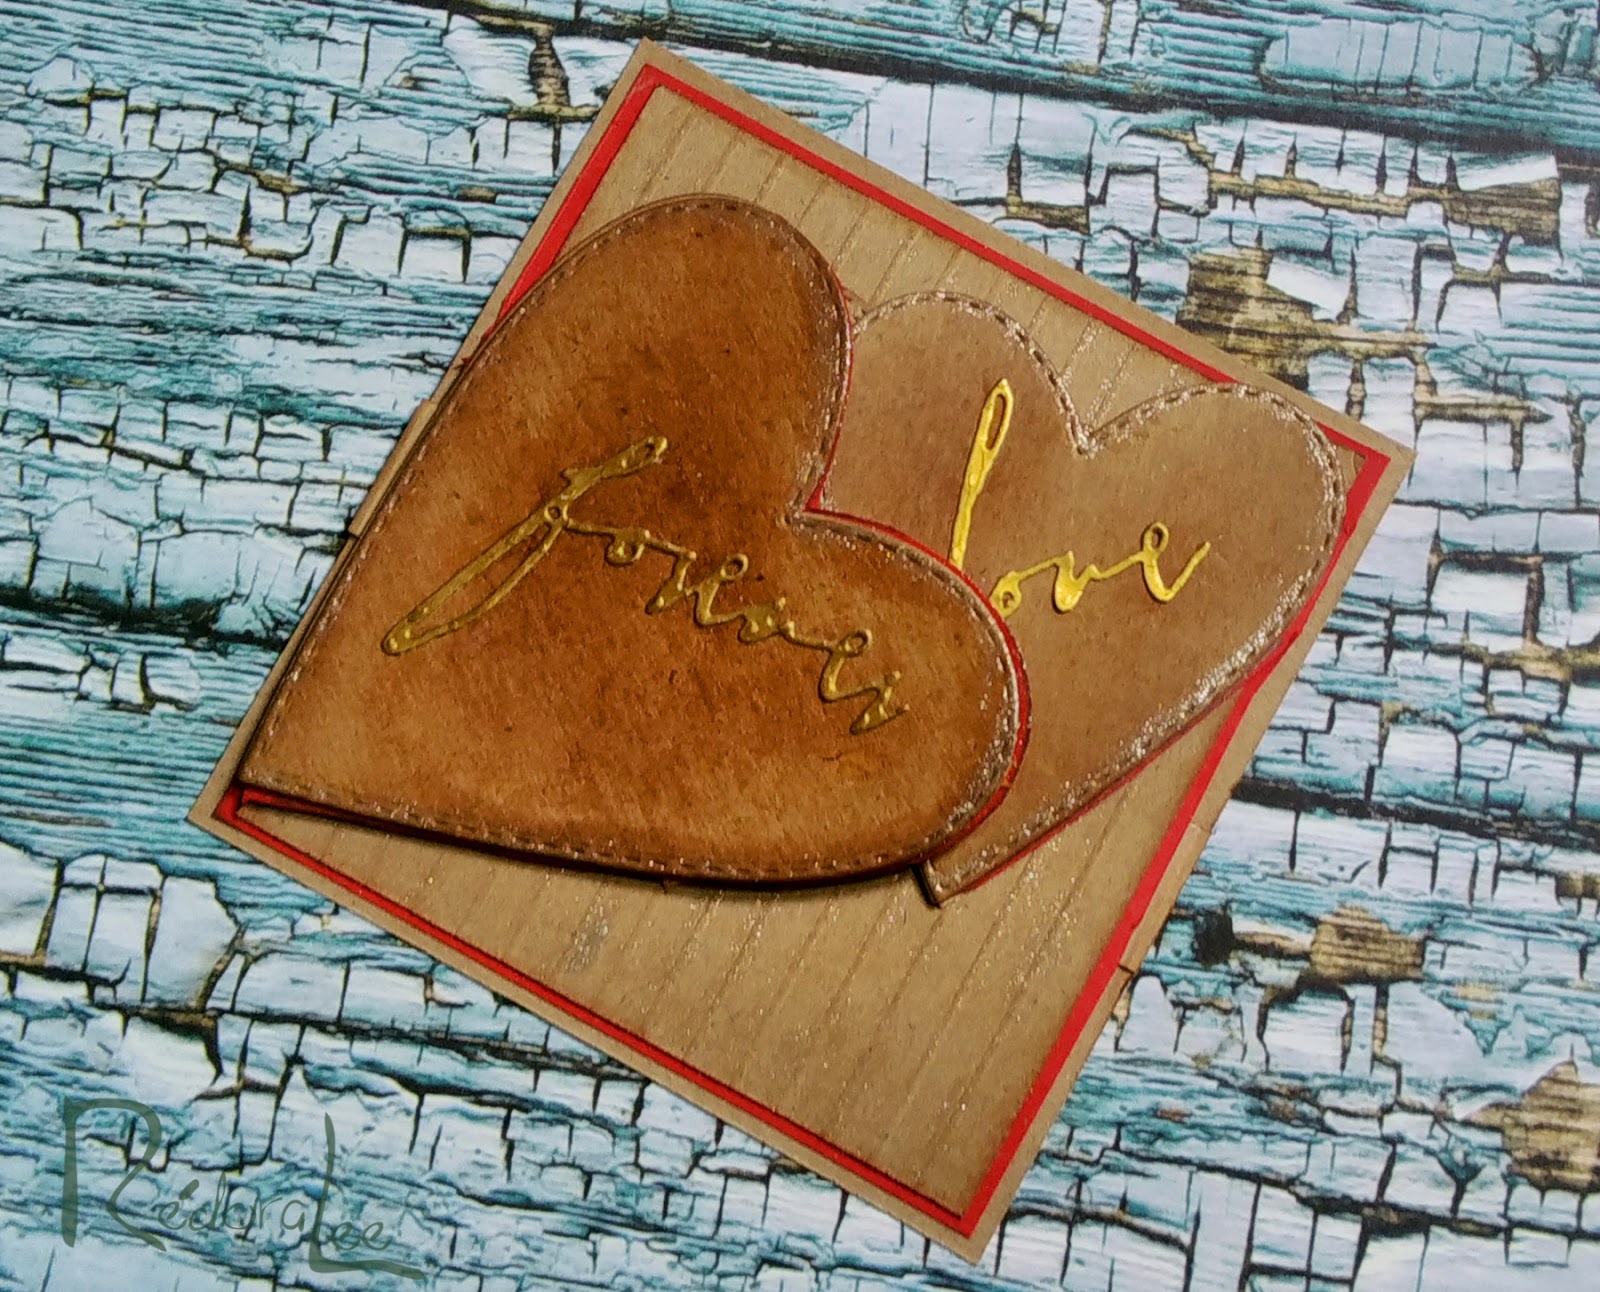
Valentine Card Tutorial and Creative Challenge #1-2019- Create A Wrap Card

Hi, Crafty Makers!
Here is an easy, fun, project for Valentine's day or any day!
 If you want to create this project but you don't own heart dies, you can always draw the hearts "free hand".   I can't draw so using the die was my best option.

CLICK HERE FOR THE CHALLENGE PAGE

Kraft card goes so well with red.  Kraft goes well with everything.
You can decorate the center panel any way you wish.  I only used another heart because our challenge theme was "Hearts on Fire".
Although it is difficult to see, I applied "Wink of Stella™" to the stitching around the hearts and on the score lines.  Shimmer was also added to the heart on the interior panel. 


Monday, February 8, 2016

Challenge # 6 - Playing with Stencils

Hello, Crafty Folks!

This week we are going to play with stencils!  Stencils open up new vistas of creativity for crafters at every skill level!    Later today, I will post a new Stencil project with a step by step tutorial.   As with all my Tutorials, draw inspiration, but if you don't have all the products...use what you have on hand, you may surprise yourself!

I am using the Tim Holtz Crackle Layering Stencil for this week's project!
BUT FIRST, HERE ARE OUR TOP THREE PROJECTS FROM CHALLENGE#5

 All of the projects were well done!  Thanks!

CHALLENGE # 5 - TOP THREE
(in no particular order)
Very balanced design!  Great image choices and composition!

The colors are nicely integrated and the bold sentiment definitely elevates the design!


Love the colors and the composition on this design!  
The addition of the twine was a great design decision.

Thanks, Ladies!  I will e-mail your badges!

CURRENT CHALLENGE:  PLAYING WITH STENCILS
The challenge this week is to use a stencil as the focal of your design.  
The FOCAL is the image, embellishment grouping, or sentiment that serves as the "center piece" of your project.  All other elements should complement the Focal point.  
Minor elements should never overwhelm your focal.  Even your background papers and layering papers should complement rather than distract from your focal elements.  
THINK PINK
This project, created for Canvas Corp Brands ® during Breast Cancer Awareness,  is one of my favorite creations using a stencil on canvas.  The Stencil "Live Inspired" is by Donna Downey.
The canvas size is 6" x 6".  

Hugz,
Chana
STAINED GLASS "NEW BABY" GIFT TAG


Supplies Needed:

Tag Dies or Tags #8,  Layering Stencil, Distress Inks, Modeling Paste, Mod Podge and Fairy Dust.
Clear Acetate.

STEPS

Determine the size of your tag, I used #8 which is the largest die in the Alterations Tag Die Set.  To get your frame,  you must use the large #8 and the next die down.   Cut a piece of card stock to serve as your base.  It should be large enough to cover the entire frame.

 Select the Distress Ink Colors you want to use for your stained glass window.  I used: Pine Needle, Aged Mahogany, Brushed Corduroy, and Chipped Sapphire.

Apply your distress ink in your desired pattern.  I used finger daubers, but I also applied ink using the Tim Holtz foam blending tool.   It is your creative decision!
Once you are satisfied with your window design, place your layering stencil (I used Tim Holtz's Crackle) over the design and apply a thin layer of modeling paste. Remove the stencil and allow the paste to air dry.  You should be able to see your colors through the paste.

After your paste has dried, use your blending tool to lightly swipe colors across the surface.  Allow the paint to dry (you can help it along with your heat tool.)  Apply a thin coat of Mod Podge and while it is still wet, sprinkle a light layer glitter over your window.  Allow to dry.
 To create the shadow box effect, apply foam tape to the sides of your window base.  I cut my foam strips in half.  I used three on each side as well as the top and bottom.  If you are making a shaker card, sealing the top and bottom will prevent your shaker elements from escaping.

You can now decorate your base and set it aside.

 Apply double stick tape to the back of your frame.  Cut a piece of Acetate large enough to cover your frame. (I cut a piece from an old die package.  I save these to use on projects.) Remove the tape cover from the frame and apply the acetate,

You can now assemble your project.  Remove the paper cover from the foam tape on your base and apply your frame.


 Backlighting highlights the Stained Glass Effect!


Remember, all challenge are open until December 31, 2016.


Monday, February 1, 2016

Challenge @ 5 - Use Three Different Papers

Hello, Crafty Beginners!
This week the challenge is to use three different design papers.   The challenge here is to combine papers that in most instances would never be used together.    
Paper Piecing is a wonderful way address a challenge like this.

Here is an example of Paper Piecing using three papers.
The third design paper is used in the bodice, skirt ruffle, socks.  It is a smaller dotted print than the background paper.   Try to keep your designs cohesive.  Don't add components simply for the sake of covering up empty space.  Empty space can make your design more interesting to the eye.  Over embellishing can diminish your design and become tiring to the eye!

Traditional Card Using 3 Design Papers
Color integration is a key factor when combining papers.  
To add interest, you can pop in a contrasting color as a counterpoint.

Paper stacks and scrap kits contain coordinated papers that work well in combination.  Challenge yourself by using papers from your stash or mix papers from different stacks!

Our Site is intended as a resource for new crafters, however, our challenges are open to all!

Good Luck!  Thanks for stopping by!
Hugz,
Chana


Friday, December 25, 2015

Paper Sizes

Hello, Crafty Peeps,

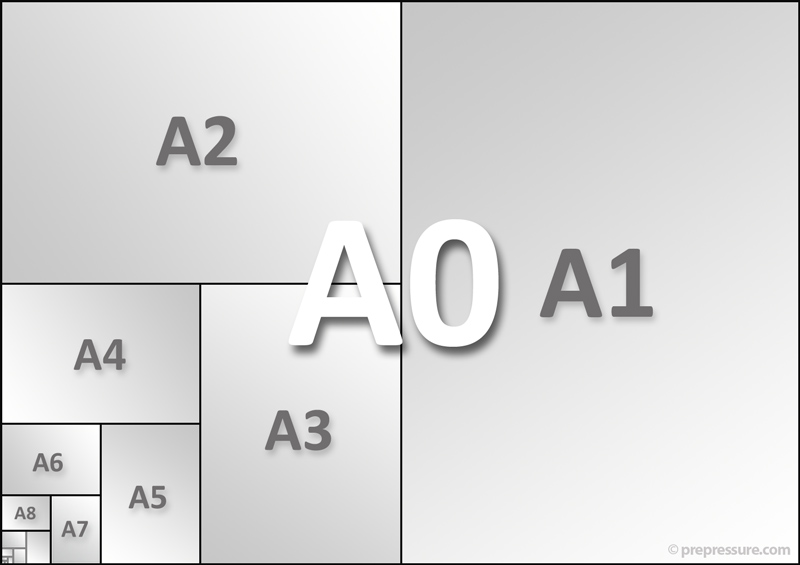
Today we are going to talk about paper sizes.   Here is a chart that will help new paper crafters understand some of the references you will see in various challenges.

The most difficult part of any undertaking is learning the "lingo."  Even crafting has it's own language that can be confusing to the uninitiated.  As you begin to participate in challenges, you may be baffled by unfamiliar terminology.  Or, if you are following a tutorial that was made in the UK, the metric system may be your stumbling block.  We will try to de-mystify the paper speak and help you get started crafting instead of cruising the net looking for answers.

American paper sizes

The US and Canada do not use the international standards but instead rely on the paper sizes below. The ANSI standard was added in 1995 to create a set of sizes that are based on shared dimensions. It lacks however the consistent aspect ratio of the ISO A-series.
Millimeters
Inches
Points
Width
Height
Width
Height
Width
Height
Letter (ANSI A)
215.9
279.4
8.5
11
612
792
Legal
215.9
355.6
8.5
14
612
1008
Ledger (ANSI B)
279.4
431.8
11
17
792
1224
Tabloid (ANSI B)
431.8
279.4
17
11
1224
792
Executive
184.1
266.7
7.25
10.55
522
756
ANSI C
559
432
22
17
1584
1224
ANSI D
864
559
34
22
2448
1584
ANSI E
1118
864
44
34
3168
2448

--------------------------------------------------------------------------------------------------------------------------
Half Fold

The easiest card in the world to make is the Half Fold.  You simply fold an 8 1/2" sheet of paper in half either vertically or horizontally.  Your finished card will measure 4 1/4" x 5 1/2.


Quarter Fold

The quarter fold is merely a half fold that is then folded in half vertically.


In card making, rather than folding on the dotted lines, the paper is cut either vertically or horizontally and then folded.  You can make two cards using one sheet of paper.  If you want to use the French Quarter Fold, it is possible to print sentiments on all panels.  But we will discuss that when we get into actual card making.


Basic Card Folds

-------------------------------------------------------------------------------------------------------------------

A5

A5 is a paper size that is often used for notepads or pocket books.

Dimensions

A5 measures 148 × 210 millimeters or 5.83 × 8.27 inches. In PostScript, its dimensions are rounded off to 420 × 595 points.

Part of the ISO 216 standard

A5 is part of a set or range of page sizes, called the ISO A or ISO 216 standard. This international standard is based on the German DIN 476 standard from 1922. A5 is actually often referred to as DIN A5. The Japanese have adopted the same range of paper sizes in their JIS P 0138-61 standard.
A0, A1, A2, A3, A4, A5, A6, A7 and A8By folding an A5 in two along its shortest side, you create an A6 document. Two A5 pages next to each other in a spread equals the A4 paper size. This way a range of paper sizes are created from A0 (which has a surface of one square meter) to A10. The height/width ratio remains constant (1:1.41 or the square root of 2) for all sizes. The dimensions always get rounded to the nearest millimeter.


Thursday, December 24, 2015

IN THE BEGINNING WAS STAMPS AND SCISSORS

Hello, Crafty Peeps

You will get here faster than you can imagine!  That's part of the Fun!

  I hope this Challenge Community will help you overcome some of the fears that come along with entering the world of crafting.   

Well, let's just get right into it.  
Here are some basic tools and other crafting supplies you will definitely need  to get started.
I have linked to Amazon because it is just easier for me to find most items there.  I am, however, recommending the brands that are specified in the listing below.   I use these products everyday and can vouch for the quality and value.  The cheapest choice is not always the best choice.

Paper Trimmer  

Scissors

Craft Knife
This is the knife I use.  I would be lost without it.  Cost a little more..but worth it.

This is my second knife!

Bone Folder

Score Board
(This is not an immediate need, since you can score your projects using your Paper Trimmer)

Die Cutting and Embossing - Manual
** Visit our page on Manual Cutting Machines to read about the differences in these machines. 
I would recommend purchasing the Big Shot Plus.

Dies - Metal and Steel Rule
I would recommend purchasing the basic shapes first.
Squares, Ovals, Rectangles, Circles
Sizzix, Tim Holtz, Spellbinders, and Memory Box are among my favorite Die companies.
You may want to purchase a few decorative dies, but, in the beginning you should probably only purchase one or two.  A lot will depend on your design aesthetic.

Paper - Card Stock//Cover Stock
**You need good, heavyweight paper #24 or higher.  I often use Cover Stock which is heavier than Card Stock.  Card Stock is good to start.

Designer Papers
This is a matter of personal taste.  I would recommend not purchasing too many of the Paper Stacks.   I would look for places that sell paper by the sheet and purchase a few that I like for specific projects.   Until you start making large numbers of cards, you may find yourself stuck with paper that your never use.  I speak from experience.  
As a matter of fact, from time to time, 
I may try to unload some of my stash on you guys! :D

Here is a place that sells by the sheet.  They also have a lot of discontinued stock.
 I also recommend:
Oozak is a great place to purchase Copic Markers  (more about that later)
I am an Amazon Prime Member so I purchase quite a bit from them, however,  I always comparison shop.  Remember to always factor in shipping and taxes.
Miscellaneous Supplies
Double-sided Tape
Liquid Adhesives**
Masking Tape/Painters Tape
Of course you will need a few stamps.  Acrylic or Wood Block Stamps. 

This page will be updated as needed!